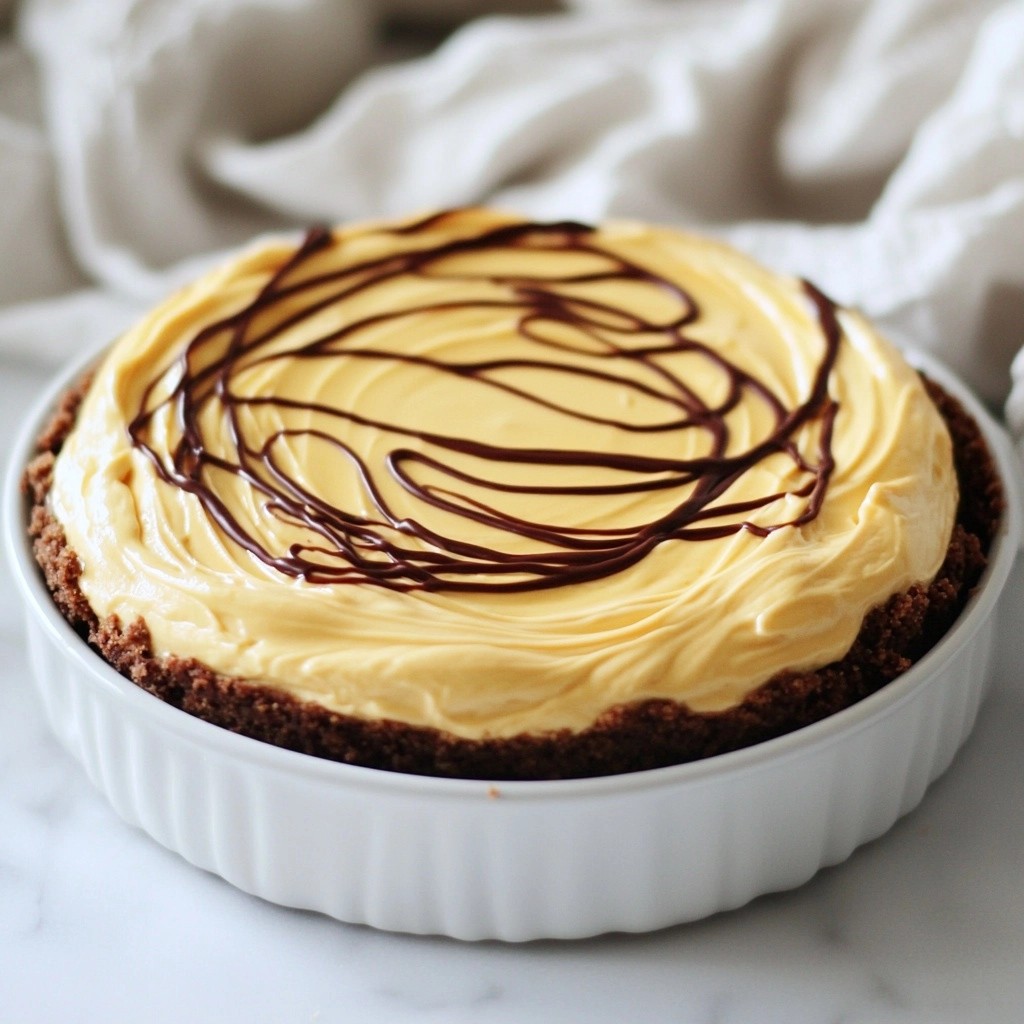
Are you ready to indulge in a dessert that won’t wreck your diet? Say hello to my Decadent Sugar-Free Peanut Butter Cheesecake Delight! This creamy, rich treat packs all the flavor of classic cheesecake without any added sugar. I’ll walk you through simple steps, share helpful tips, and even offer variations. Dive in and discover a sweet solution that fits into your healthy lifestyle!
Why I Love This Recipe
- Guilt-Free Indulgence: This cheesecake allows you to enjoy a rich dessert without the added sugars, perfect for those on a sugar-free diet.
- Simple Ingredients: Made with easy-to-find ingredients, this recipe is accessible and convenient for home bakers.
- Decadent Flavor: The combination of peanut butter and chocolate creates a mouthwatering flavor profile that everyone will love.
- Versatile Serving Options: This cheesecake can be served plain or dressed up with sugar-free toppings, making it suitable for any occasion.
Ingredients
Dry Ingredients
- 1 ½ cups almond flour
- ¼ cup unsweetened cocoa powder
- ½ cup erythritol or preferred sugar substitute
Wet Ingredients
- ½ cup unsweetened peanut butter
- 3 tablespoons coconut oil, melted
- 2 tablespoons maple syrup (sugar-free option)
Dairy Ingredients
- 1 cup cream cheese, softened
- ½ cup plain Greek yogurt, unsweetened
- 3 large eggs
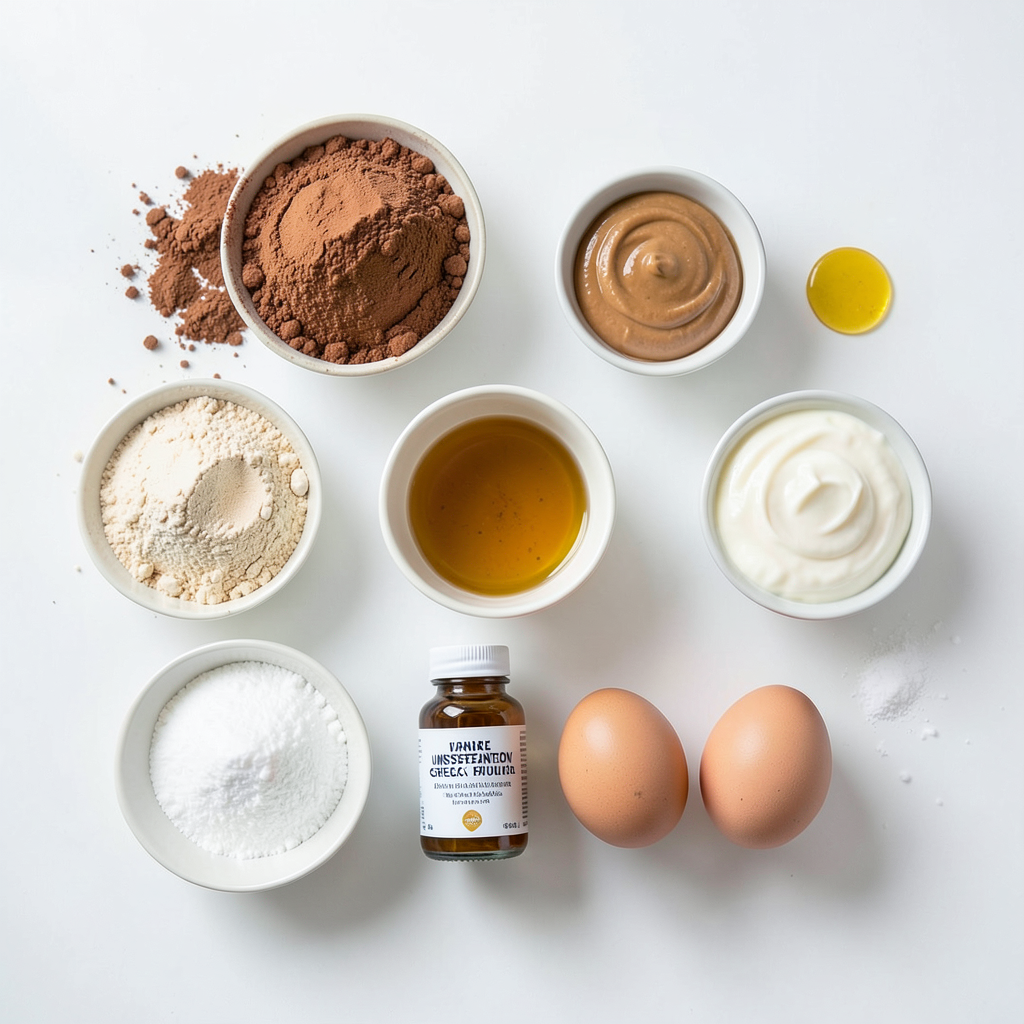
When making this cheesecake, the right ingredients matter. They bring flavor and texture. Almond flour is a great base. It gives the crust a nice nutty taste. Unsweetened cocoa powder adds rich chocolate flavor. Erythritol or your favorite sugar substitute keeps it sugar-free.
For the wet ingredients, unsweetened peanut butter is key. It makes the cheesecake creamy and rich. Coconut oil adds moisture and helps bind the crust. The sugar-free maple syrup gives a touch of sweetness without extra calories.
The dairy ingredients are crucial for the cheesecake’s smoothness. Cream cheese provides that classic cheesecake taste. Greek yogurt adds creaminess and a bit of tang. Eggs help the cheesecake set perfectly.
Each ingredient plays a role in making this decadent sugar-free peanut butter cheesecake a delight. Enjoy the process of gathering these simple yet essential items. They will take you closer to a delicious treat that everyone will love!
Step-by-Step Instructions
Preparing the Crust
1. Preheat the oven: Start by setting your oven to 350°F (175°C). This step is key for a nice crust.
2. Combine dry ingredients: In a mixing bowl, add 1 ½ cups of almond flour and ¼ cup of unsweetened cocoa powder. These give the crust its base and rich flavor.
3. Form and bake the crust: Add ½ cup of unsweetened peanut butter, 3 tablespoons of melted coconut oil, and 2 tablespoons of sugar-free maple syrup to the bowl. Mix everything until it is crumbly. Next, press the mixture into the bottom of a 9-inch springform pan. Use your fingers or the back of a cup to make it even. Bake for 10 minutes, then let it cool.
Making the Cheesecake Filling
1. Beat cream cheese and yogurt: In a large bowl, combine 1 cup of softened cream cheese and ½ cup of plain Greek yogurt. Beat them together until smooth and creamy.
2. Incorporate sugar substitute: Gradually add in ½ cup of erythritol or your favorite sugar substitute. Keep beating until it blends well.
3. Add flavors and mix until smooth: Mix in 2 teaspoons of vanilla extract, 3 large eggs, and a pinch of salt. Beat until the mixture is completely smooth with no lumps.
Baking the Cheesecake
1. Combine crust and filling: Carefully pour the cheesecake filling onto your cooled crust in the springform pan. Smooth the top with a spatula.
2. Bake time and techniques: Place the cheesecake in your preheated oven. Bake for 45-50 minutes. The center should be set but still slightly jiggly.
3. Cooling method to prevent cracking: After baking, turn off the oven and crack the door open. Let the cheesecake cool in the oven for about 1 hour. This helps prevent cracks.
Tips & Tricks
Achieving the Perfect Texture
To avoid lumps in your filling, make sure your cream cheese is very soft. Leave it at room temperature for about 30 minutes. When you beat the cream cheese, do so slowly at first. This helps it mix smoothly with other ingredients. Mix in the Greek yogurt next, then add the erythritol. Beat until the mixture is fully smooth.
When creaming cheese, use a stand mixer if you can. This gives a nice, fluffy texture. If you don’t have one, a hand mixer works fine too. Just remember to scrape down the sides of the bowl often.
Baking Success Tips
Keeping your oven at a stable temperature is key. Always preheat your oven to 350°F (175°C) before baking. Use an oven thermometer to check your oven's accuracy. If it runs hot or cold, adjust the temperature accordingly.
Cooling the cheesecake is just as important. After baking, turn off the oven and crack the door open. Let the cheesecake sit in the oven for about one hour. This helps prevent cracks on the surface. After that, chill it in the fridge for at least four hours. Overnight is best for a perfect set.
Presentation Tips
When garnishing, use a drizzle of sugar-free chocolate sauce for a nice touch. You can also add some fresh berries or a dollop of whipped cream on top. These add color and flavor without extra sugar.
For serving, use a sharp knife to cut clean slices. Dip the knife in warm water before each cut for a smooth finish. This makes each slice look neat and appealing. Aim for serving sizes of about one piece per person to keep it simple.
Pro Tips
- Use Room Temperature Ingredients: Allow your cream cheese and eggs to come to room temperature before mixing. This ensures a smooth and creamy filling without lumps.
- Prevent Cracking: Cooling the cheesecake gradually in the oven with the door cracked helps prevent cracks on the surface. This technique allows for a gentle temperature transition.
- Choose Quality Peanut Butter: For the best flavor, use a natural, unsweetened peanut butter. This will enhance the richness of the cheesecake while keeping it sugar-free.
- Chill for Best Texture: Letting the cheesecake chill overnight not only helps it set better but also allows the flavors to meld, resulting in a more delicious dessert.
Variations
Flavor Variations
You can add fun twists to your peanut butter cheesecake.
- Chocolate peanut butter twist: Mix in some unsweetened cocoa powder into the filling. This adds rich chocolate flavor. Adjust the cocoa to taste.
- Adding fruits: You can toss in mashed banana or fresh berries. They bring a burst of freshness. Strawberries and raspberries pair well with the creamy cheesecake.
Dietary Adjustments
If you have dietary needs, you can still enjoy this cheesecake.
- Keto-friendly alternatives: Use a sugar substitute like stevia. Swap the maple syrup for a sugar-free version. This keeps it low in carbs while still tasty.
- Nut-free options: Replace almond flour with sunflower seed flour. Check your peanut butter for any added sugars.
Crust Alternatives
You can change up the crust to fit your taste.
- Using a traditional graham cracker crust: If you enjoy the classic taste, use crushed graham crackers. Combine them with melted butter and press into the pan.
- Gluten-free crust options: If you need gluten-free, use gluten-free cookies. They provide a great base with a nice crunch.
Storage Info
How to Store
To keep your decadent sugar-free peanut butter cheesecake fresh, store it properly.
- Refrigeration tips: Place the cheesecake in an airtight container. It keeps well in the fridge. Make sure to cover it tightly with plastic wrap if you don’t have a container. This helps keep moisture in and prevents it from absorbing other smells.
- Freezing instructions: You can also freeze slices of cheesecake. Wrap each slice in plastic wrap, then place it in a freezer-safe bag. This way, you can enjoy a piece later! It will stay good for about three months in the freezer.
Shelf Life
You’ll want to know how long your cheesecake lasts.
- How long it lasts in the fridge: The cheesecake will stay fresh in the fridge for up to one week.
- Signs that it has gone bad: Check for any changes in color or texture. If it smells off, it’s best to throw it away. Mold is a clear sign that it’s no longer good to eat.
Reheating Guidelines
If you want to enjoy your cheesecake again, here’s how to do it right.
- Best methods for thawing: For frozen cheesecake, take it out and let it thaw in the fridge overnight. This keeps it creamy. Avoid microwave defrosting, as it may change the texture.
- Serving chilled vs. at room temperature: You can serve the cheesecake chilled or at room temperature. If you prefer a softer texture, let it sit out for about 30 minutes before serving. Enjoy the rich flavors at any temperature you like!
FAQs
What makes this cheesecake sugar-free?
This cheesecake uses erythritol as a sugar substitute. Erythritol is a natural sweetener. It has fewer calories than sugar and does not spike blood sugar. You can also use other sugar substitutes if you like. Options include stevia or monk fruit sweetener. These substitutes keep the cheesecake sweet without adding sugar.
Can I make this cheesecake dairy-free?
Yes, you can easily make this cheesecake dairy-free. Replace cream cheese with a dairy-free cream cheese. Look for brands made from nuts or tofu. For Greek yogurt, use coconut yogurt or almond yogurt. Ensure these are plain and unsweetened. You may also need to adjust the texture slightly, but it will still taste great.
Is there a no-bake version of this recipe?
Yes, you can make a no-bake version! For this, skip the baking steps. Instead, prepare the crust and press it into the pan as usual. For the filling, mix the cream cheese and yogurt with the sugar substitute. Use gelatin or agar-agar to help it set. Chill it for several hours until firm. This way, you get a creamy cheesecake without turning on the oven!
This blog post covered a delicious sugar-free cheesecake recipe. We explored key ingredients like almond flour, peanut butter, and cream cheese. You learned to prepare the crust, mix the filling, and achieve the perfect bake.
I shared tips for texture, baking success, and presentation to impress. With variations for different diets, you can make this cheesecake suit your needs.
Now, enjoy your cheesecake and remember to store it properly for the best taste!