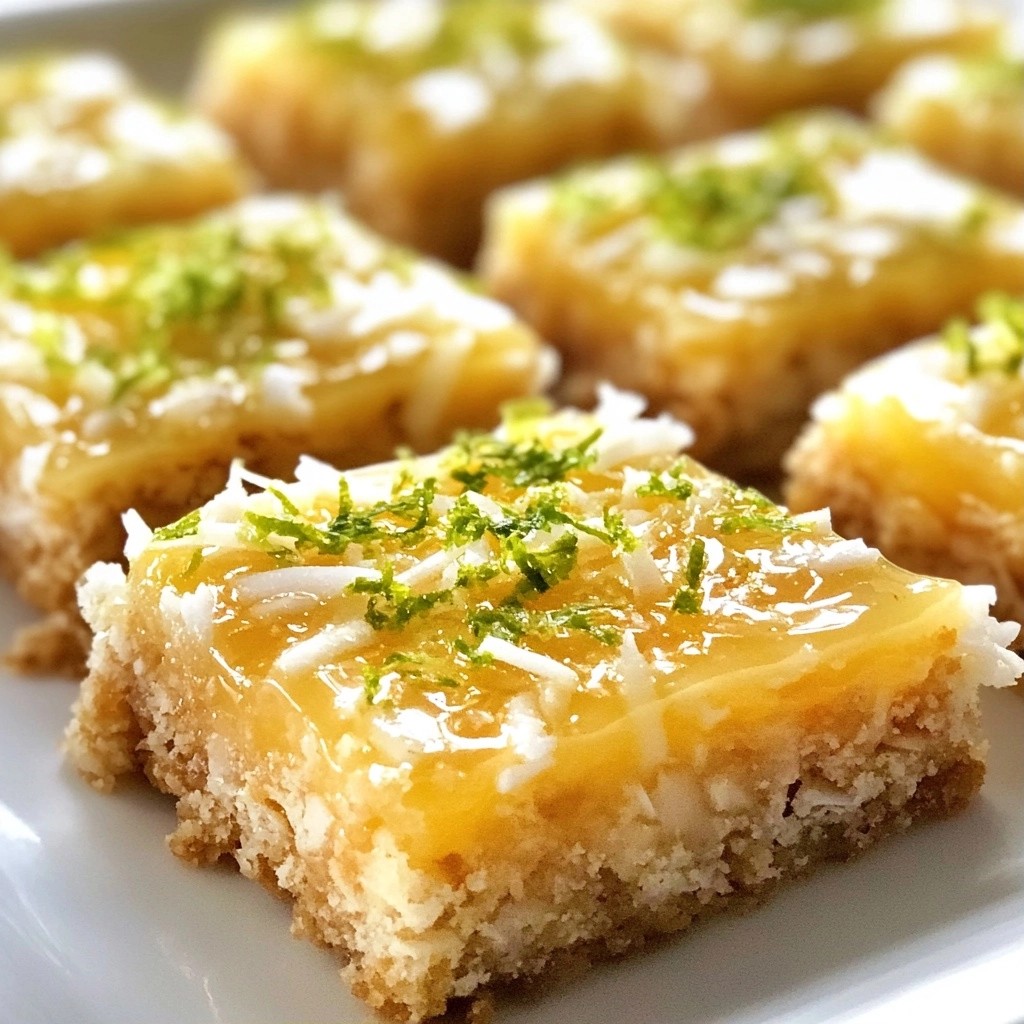
Craving a tasty treat that won't add sugar to your diet? These No-Bake Sugar-Free Coconut Lime Bars are a perfect solution! With zesty lime and creamy coconut, they bring a burst of flavor without the guilt. I’ll guide you through simple steps to make these bars, along with helpful tips, variations, and storage secrets. You can enjoy this delightful treat anytime, without any baking mess! Ready to dive in?
Why I Love This Recipe
- Delicious Flavor: The combination of coconut and lime creates a tropical flavor that is both refreshing and indulgent.
- Healthy Ingredients: Made with almond flour and unsweetened coconut, these bars are a nutritious snack option.
- Quick Prep Time: With only 10 minutes of prep, you can have these bars ready to chill in no time.
- Versatile Treat: Perfect for a snack, dessert, or even a breakfast option, these bars fit any occasion!
Ingredients
List of Ingredients
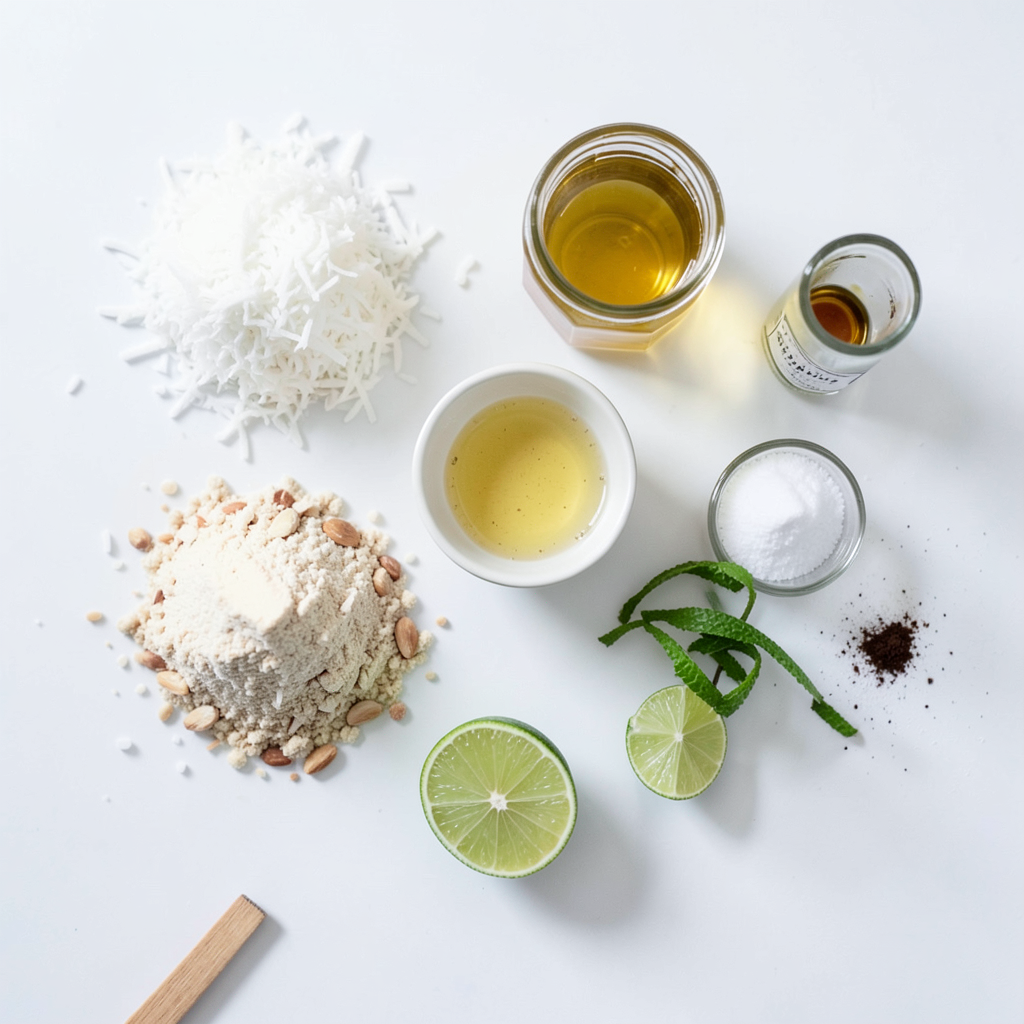
To make No-Bake Sugar-Free Coconut Lime Bars, you will need:
- 1 cup unsweetened shredded coconut
- 1 cup almond flour
- 1/4 cup coconut oil, melted
- 1/4 cup honey or sugar-free sweetener of choice
- 1/4 cup lime juice (freshly squeezed)
- Zest of 2 limes
- 1 teaspoon vanilla extract
- Pinch of salt
Dietary Considerations
These bars are great for many diets. They are gluten-free and low in sugar. Using almond flour makes them suitable for a keto diet. The coconut oil adds healthy fats. This recipe also avoids refined sugars. If you're watching carbs, these bars fit well.
Recommended Substitutions
You can switch almond flour for coconut flour if you prefer. Just use less, about 2/3 cup. For a nut-free option, use sunflower seed flour. If you want a different sweetener, try agave syrup or stevia. Make sure you adjust the amount based on the sweetness. For a vegan option, use maple syrup instead of honey.
Step-by-Step Instructions
Preparation of the Baking Pan
To start, grab an 8x8-inch baking pan. Line it with parchment paper. Make sure to leave some overhang. This helps with easy removal later.
Mixing Ingredients
Next, get a large mixing bowl. Add 1 cup of unsweetened shredded coconut. Then, add 1 cup of almond flour. Pour in 1/4 cup of melted coconut oil. Add 1/4 cup of honey or your favorite sugar-free sweetener. Squeeze in 1/4 cup of fresh lime juice. Don’t forget the zest of 2 limes! Include 1 teaspoon of vanilla extract and a pinch of salt. Mix everything well until it feels sticky.
Transfer and Press into the Pan
Now, take the sticky mixture and pour it into the prepared pan. Use the back of a spatula or your hands to press it down. Make sure it is packed tightly and evenly. This step is key for the perfect texture.
Chilling the Bars
After packing, put the pan in the fridge. Let it chill for at least 2 hours. This helps the bars set properly. Once firm, lift the bars out using the parchment overhang. Cut them into squares or rectangles. Enjoy your delicious coconut lime bars!
Tips & Tricks
Ensuring the Right Texture
To get the right texture for your coconut lime bars, use fresh ingredients. Fresh lime juice and zest make a big difference. The mixture should feel sticky but not runny. If it feels too dry, add a bit more melted coconut oil. Press the mixture firmly into the pan. This helps the bars hold together once chilled.
Flavor Enhancement Suggestions
Want to boost the flavor? You can add a pinch of sea salt to bring out the lime. If you like a sweeter taste, use more honey or your favorite sugar-free sweetener. For a twist, try adding a few drops of coconut extract or a handful of chopped nuts. These additions can create a more complex flavor profile.
Common Mistakes to Avoid
One mistake to avoid is skipping the chilling step. Chilling for at least two hours helps the bars set. If you cut them too soon, they will crumble. Another mistake is not packing the mixture tightly enough in the pan. This can cause the bars to fall apart. Always make sure to press it down well before you refrigerate.
Pro Tips
- Choose Fresh Limes: Always opt for fresh limes for the best flavor and zest. They will enhance the taste of your bars significantly.
- Press Firmly: Make sure to press the mixture firmly into the pan to ensure the bars hold together well once set. A tightly packed mixture will create a better texture.
- Experiment with Sweeteners: If you're looking for a sugar-free option, try using stevia or erythritol in place of honey. Adjust the quantity to taste, as some sweeteners are sweeter than others.
- Storage Tips: Store the bars in an airtight container in the fridge to maintain their freshness. They can last up to a week, but they’re best enjoyed within the first few days.
Variations
Alternative Flavor Combinations
You can switch up the flavors to keep things exciting. Try adding cocoa powder for a chocolate twist. You can also mix in some crushed pineapple for a tropical vibe. If you like berries, add dried cranberries or blueberries for extra sweetness. Just remember to keep the balance between sweet and tart.
Ingredient Swaps for Keto-Friendly Options
If you want to make these bars more keto-friendly, swap the honey for a sugar-free sweetener. Options like erythritol or stevia work well. You can also replace almond flour with coconut flour, but use less, as coconut flour is more absorbent. This keeps the bars moist while staying low in carbs.
Serving Suggestions
These bars are great for many occasions. Serve them as a refreshing snack on a hot day. You can also cut them into smaller bites for parties. For a fun touch, drizzle some sugar-free chocolate on top. They also pair well with a dollop of whipped cream or a scoop of sugar-free ice cream. Enjoy them chilled for the best taste!
Storage Info
Best Practices for Refrigeration
To keep your no-bake sugar-free coconut lime bars fresh, store them in an airtight container. Use a container that seals well to prevent moisture from getting in. Place a piece of parchment paper between layers if you stack them. This will help maintain their shape and texture.
How Long They Last
These bars can last up to a week in the fridge. After a few days, they may lose some freshness. If you want them to last longer, consider freezing them.
Freezing Instructions
To freeze the bars, first, cut them into squares. Wrap each square tightly in plastic wrap. Then, place them in a freezer-safe container or bag. They will keep well for about three months. When you're ready to eat one, let it thaw in the fridge overnight. Enjoy the chilled taste of coconut and lime!
FAQs
Can I use other sweeteners?
Yes, you can use other sweeteners. If you want a sugar-free option, go for stevia or monk fruit. Both work well and keep the bars sweet. Just remember to check the sweetness level. Some sweeteners are stronger than sugar. Adjust the amount to taste for the best flavor.
How do I make these bars vegan?
To make these bars vegan, simply replace honey with maple syrup or agave nectar. Both are great choices. They will keep the bars sweet and moist. The other ingredients like coconut and almond flour are already plant-based. Enjoy your tasty vegan treat!
What are the nutritional benefits of these bars?
These bars offer great nutrition. They are rich in healthy fats from coconut and almond flour. They provide fiber and protein, too. Lime adds vitamin C, which helps boost your immune system. Plus, they are low in sugar. This makes them perfect for a healthy snack.
Can I use a different type of nut flour?
Yes, you can use other nut flours. Cashew flour or hazelnut flour can work well. They will change the flavor slightly but add a nice twist. Just make sure to use the same amount as almond flour. This will keep the texture consistent and delicious.
This blog post has covered the key steps to make delicious bars. We discussed the ingredients, storage tips, and common mistakes to avoid. You can tweak flavors and try different ingredient swaps. Remember, you can also ask about sweeteners and vegan options for your recipe. Enjoy your baking journey and make these bars fit your taste. With the right tips, you’ll create a treat everyone will love.