Are you craving a rich dessert that won’t spike your sugar levels? You’re in luck! My Decadent Sugar-Free Coffee Chocolate Tart is a game-changer. This tart delivers a perfect balance of coffee and chocolate, providing the indulgence you deserve without the guilt. Follow my easy recipe, filled with tips and variations, to create a show-stopping dessert that everyone will love—yes, even those who aren't fans of sugar-free treats!
Why I Love This Recipe
- Decadent Flavor: This tart combines rich dark chocolate and coffee for a luxurious taste experience.
- Guilt-Free Indulgence: With no added sugar, you can enjoy this dessert without the extra calories.
- Simple Ingredients: Made with easy-to-find ingredients, this recipe is accessible for everyone.
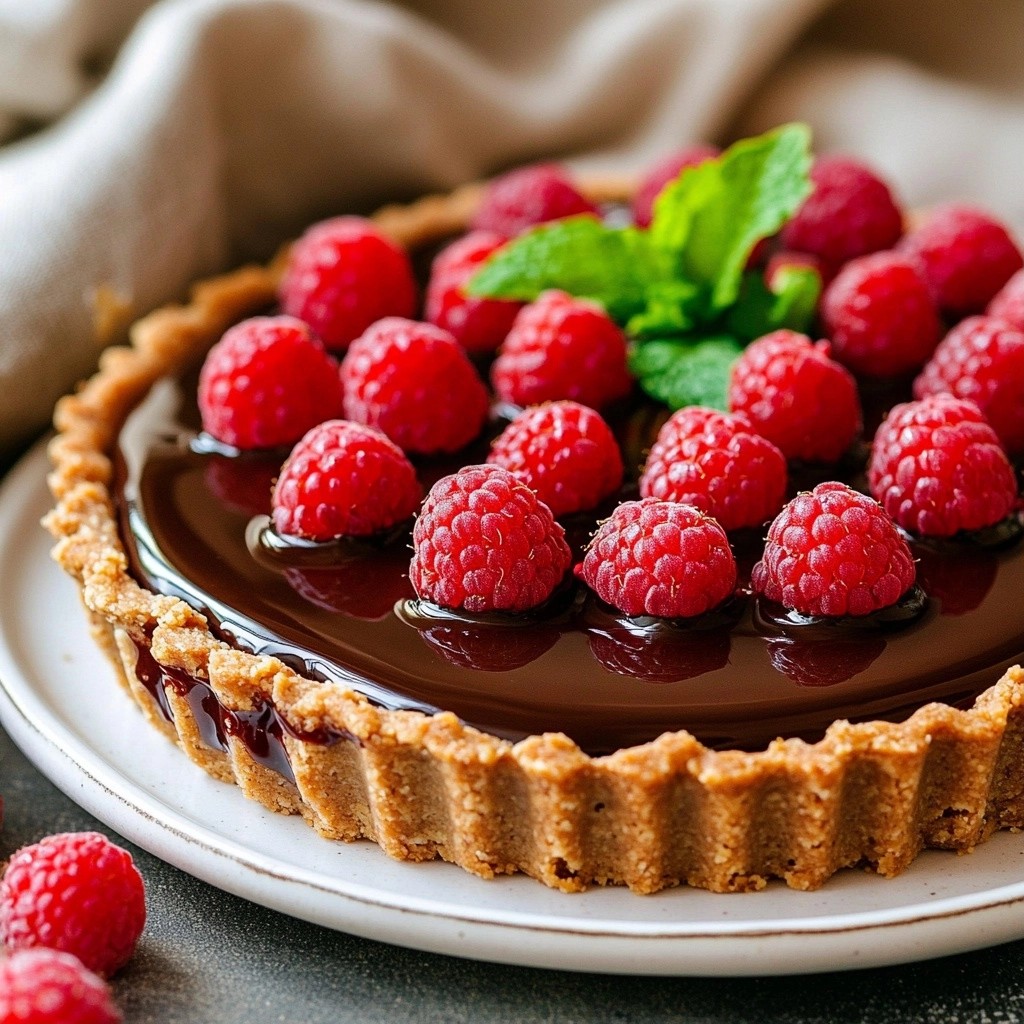
- Beautiful Presentation: The tart looks stunning when garnished with fresh raspberries and mint, making it perfect for any occasion.
Ingredients
List of Ingredients
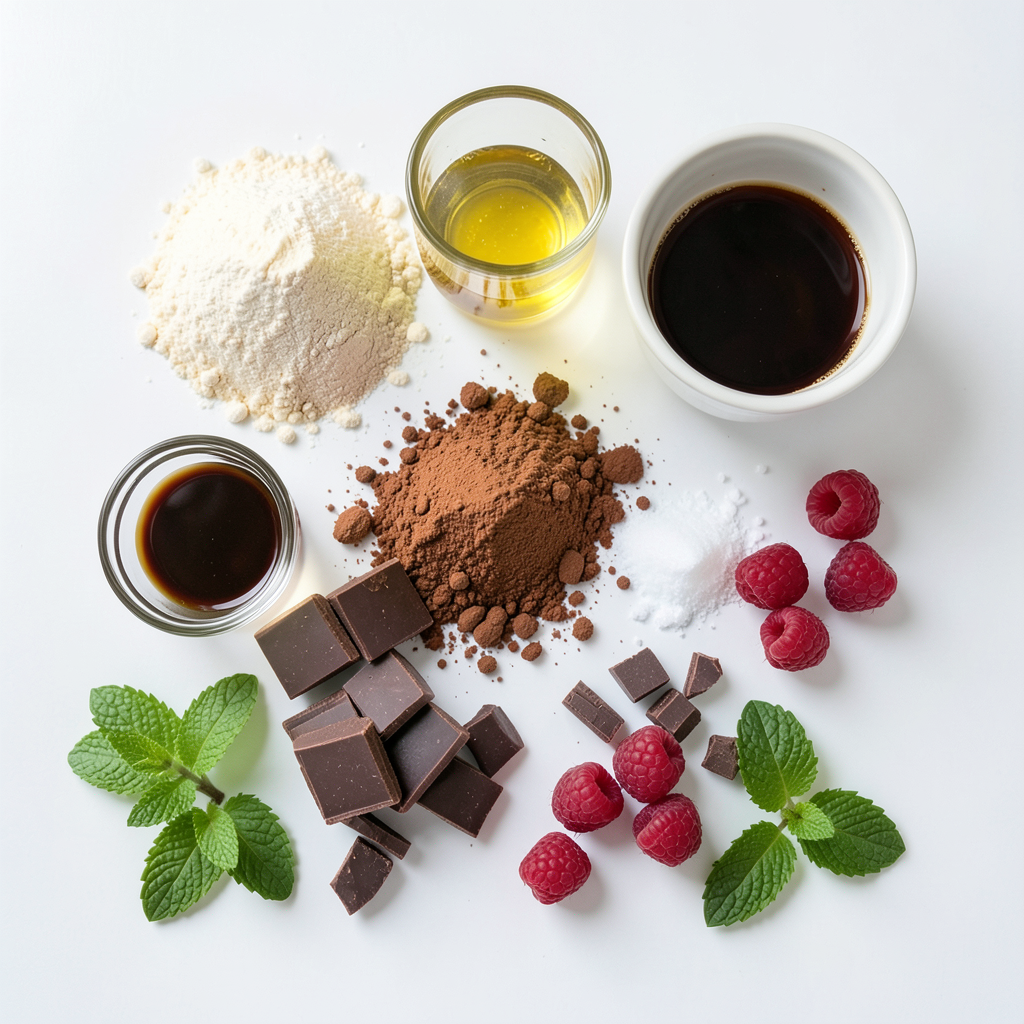
To make the Decadent Sugar-Free Coffee Chocolate Tart, gather these simple ingredients:
- 1 ½ cups almond flour
- ¼ cup unsweetened cocoa powder
- ¼ cup coconut oil, melted
- 2 tablespoons erythritol or your preferred sugar substitute
- 1 teaspoon vanilla extract
- Pinch of salt
- 1 cup unsweetened dark chocolate (70% cocoa or higher), chopped
- ½ cup strong brewed coffee, cooled
- 2 tablespoons unsweetened almond milk
- 1 teaspoon instant coffee granules
- Fresh raspberries and mint leaves for garnish
Alternative Sweetener Options
If you want to swap out erythritol, there are great options. You can use stevia or monk fruit sweetener. Both can add sweetness without sugar. You may need to adjust the amount. Always taste as you go!
Recommended Chocolate Types
Choose dark chocolate with at least 70% cocoa for rich taste. Brands like Lindt or Ghirardelli work well. If you want a milder flavor, try semi-sweet chocolate. Just make sure it is sugar-free. You can also explore dairy-free chocolate for vegan options.
Step-by-Step Instructions
Preheating the Oven
First, you need to preheat your oven to 350°F (175°C). This step is key. A hot oven helps the crust bake evenly. Make sure it reaches the right temperature before you bake.
Making the Tart Crust
In a mixing bowl, combine:
- 1 ½ cups almond flour
- ¼ cup unsweetened cocoa powder
- ¼ cup melted coconut oil
- 2 tablespoons erythritol
- 1 teaspoon vanilla extract
- A pinch of salt
Mix until a dough forms. This dough should feel slightly moist. Next, press the dough into a 9-inch tart pan. Make sure the crust is even across the bottom and up the sides. Use a fork to poke holes in the crust. This step stops it from bubbling while baking.
Preparing the Chocolate Filling
In a heatproof bowl, combine:
- 1 cup chopped unsweetened dark chocolate
- ½ cup cooled strong brewed coffee
- 2 tablespoons unsweetened almond milk
- 1 teaspoon instant coffee granules
Place this bowl over a pot of simmering water. Stir gently until the chocolate melts. It should turn smooth and glossy. This filling is rich and full of flavor.
Chilling and Serving the Tart
Pour the melted chocolate filling into the cooled tart crust. Spread it evenly across the top. Now, refrigerate the tart for at least 2 hours. You want it to set completely. Once set, slice the tart into wedges. For a lovely touch, garnish with fresh raspberries and mint leaves before serving. Enjoy your delicious creation!
Tips & Tricks
How to Avoid a Soggy Crust
To keep your crust from becoming soggy, poke holes in it. Use a fork to make small holes all over the crust before you bake it. This lets steam escape. Bake it until it is slightly firm. Let it cool completely before adding the filling.
Maximizing Chocolate Flavor
To boost the chocolate flavor, use high-quality dark chocolate. I recommend chocolate with at least 70% cocoa. Combining dark chocolate with brewed coffee enhances the taste. The coffee brings out the rich notes in the chocolate. Adding a touch of instant coffee granules deepens this flavor, making it even more intense.
Presentation Tips for Serving
For a lovely presentation, slice your tart into wedges. Serve it on elegant dessert plates. You can drizzle extra melted dark chocolate on top for flair. A light dusting of cocoa powder adds a nice touch too. Finally, garnish with fresh raspberries and mint leaves for color and freshness.
Pro Tips
- Use High-Quality Chocolate: Opt for high-quality dark chocolate with at least 70% cocoa for a richer flavor and smoother texture in your filling.
- Let the Tart Cool Completely: Ensure the crust is completely cooled before adding the filling to prevent it from melting and losing its shape.
- Experiment with Flavors: Consider adding a pinch of cinnamon or a splash of almond extract to the filling for an extra layer of flavor.
- Serve with Fresh Fruits: Pairing the tart with fresh fruits like raspberries or strawberries not only adds brightness but also balances the richness.
Variations
Nut-Free Options
If you have nut allergies, you can still enjoy this tart. Replace almond flour with oat flour or sunflower seed flour. These options keep the tart gluten-free and nut-free. Just be sure to check that your flour is certified gluten-free if needed.
Vegan Modifications
Making this tart vegan is simple. Use a plant-based butter instead of coconut oil for the crust. For the filling, swap the dark chocolate with vegan chocolate. Make sure the chocolate has no dairy. You can also replace almond milk with any other plant milk like soy or oat milk.
Flavor Add-Ins and Enhancements
Feel free to play with flavors! Add a pinch of cinnamon or a splash of almond extract. You can also blend in some orange zest for a citrus twist. For coffee lovers, try using espresso instead of brewed coffee for a stronger flavor. Add a splash of vanilla extract for more depth in your chocolate filling. Each change will make your tart unique.
Storage Info
Best Practices for Storing Leftovers
After you enjoy your tart, store any leftovers in the fridge. Wrap the tart tightly in plastic wrap or place it in an airtight container. This keeps it fresh and moist. Avoid stacking other items on top. The tart can absorb smells from other foods.
How to Freeze Portions
You can freeze slices of this tart for later. First, wrap each slice in plastic wrap. Then, place them in a freezer-safe bag or container. Be sure to label the bag with the date. This way, you’ll know when to enjoy it again. Thaw slices in the fridge overnight for best results.
Shelf Life of the Tart
The tart stays fresh in the fridge for about 4 to 5 days. If frozen, it lasts up to 3 months. Just remember, the quality is best when eaten sooner. Enjoying it fresh gives the best taste and texture.
FAQs
Can I use a different type of flour?
Yes, you can use different flours. Almond flour gives a nice flavor and texture. If you want a nut-free option, try oat flour or coconut flour. Keep in mind, each flour has its own taste and texture. You may need to adjust the amount of liquid in the recipe. Experiment and see what you like best!
How can I make this tart even more decadent?
To make this tart even more decadent, you can add toppings. Consider drizzling melted dark chocolate on top. You can also sprinkle sea salt for a sweet-salty taste. Fresh berries or a dollop of whipped coconut cream will enhance flavors. Try adding a layer of caramel made with your favorite sugar substitute. These little touches make your tart shine!
What is the best way to serve this tart?
The best way to serve this tart is chilled. Slice it into wedges for easy sharing. Garnish with fresh raspberries and mint leaves for color and flavor. You can also dust cocoa powder on top for a fancy finish. Serve it on elegant plates to impress your guests. Pair it with a cup of coffee for a delightful treat!
This blog post shared tasty recipes and clear steps to make a perfect chocolate tart. You learned how to pick the right ingredients, make the crust, and prepare the filling. I also shared tips to keep your crust crisp and ways to customize your tart. Storing leftovers properly helps maintain freshness. Remember, experimenting with flavors makes it even more fun. Enjoy your baking, and don’t hesitate to try new ideas!