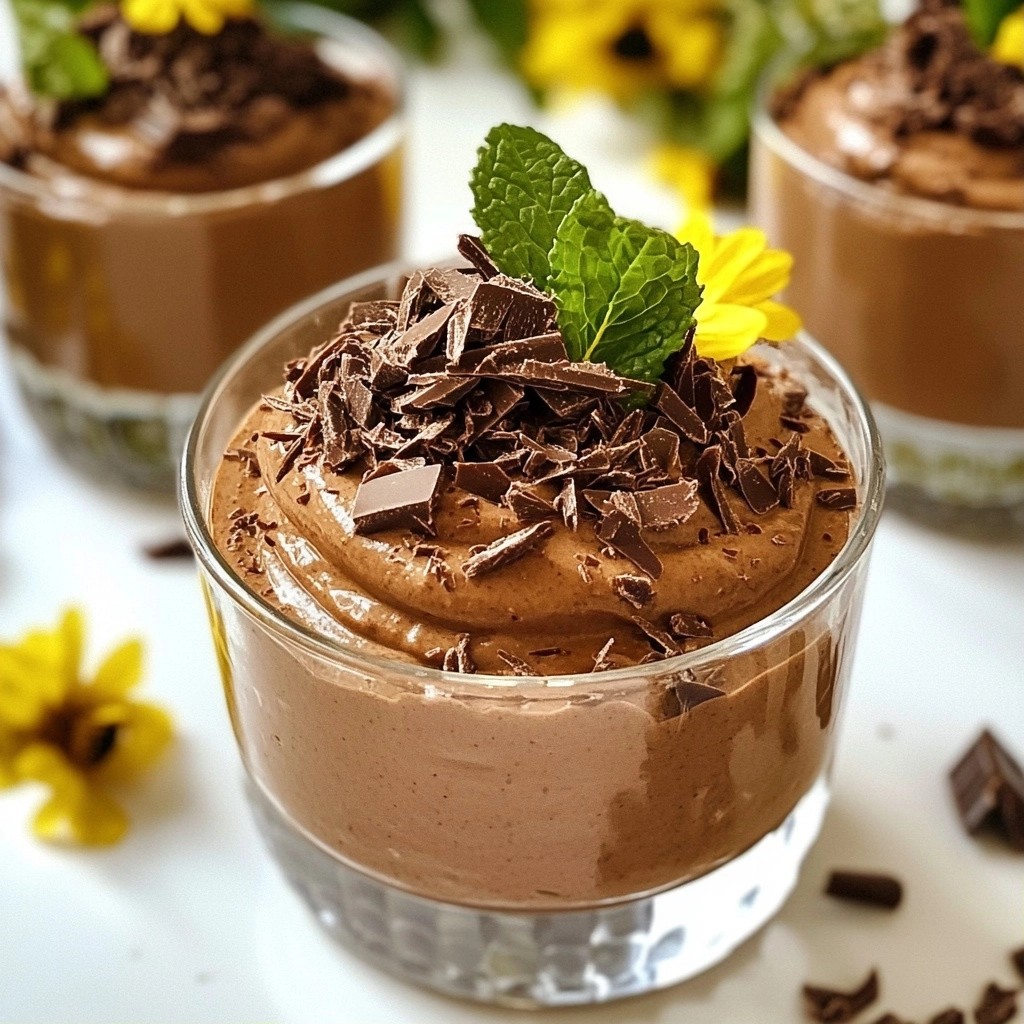
Are you craving something rich and refreshing? My Decadent Keto Chocolate Mint Mousse Delight is your answer! This creamy dessert satisfies your sweet tooth without the carbs. By using simple, keto-friendly ingredients, I’ll guide you step-by-step to create a luscious treat. With options to customize flavors and perfect presentation tips, you'll impress everyone at your table. Let’s dive in and whip up this delightful mousse!
Why I Love This Recipe
- Decadent Flavor: This mousse combines the rich taste of dark chocolate with a refreshing hint of mint, creating a delightful dessert that satisfies cravings.
- Keto-Friendly: Made with sugar-free chocolate and a keto sweetener, this dessert fits perfectly into a low-carb lifestyle without sacrificing taste.
- Quick Preparation: With only 10 minutes of prep time, you can whip up this indulgent treat in no time, making it perfect for unexpected guests.
- Beautiful Presentation: Serve it in clear cups to showcase its luxurious texture, and garnishing with chocolate shavings and mint elevates the visual appeal.
Ingredients
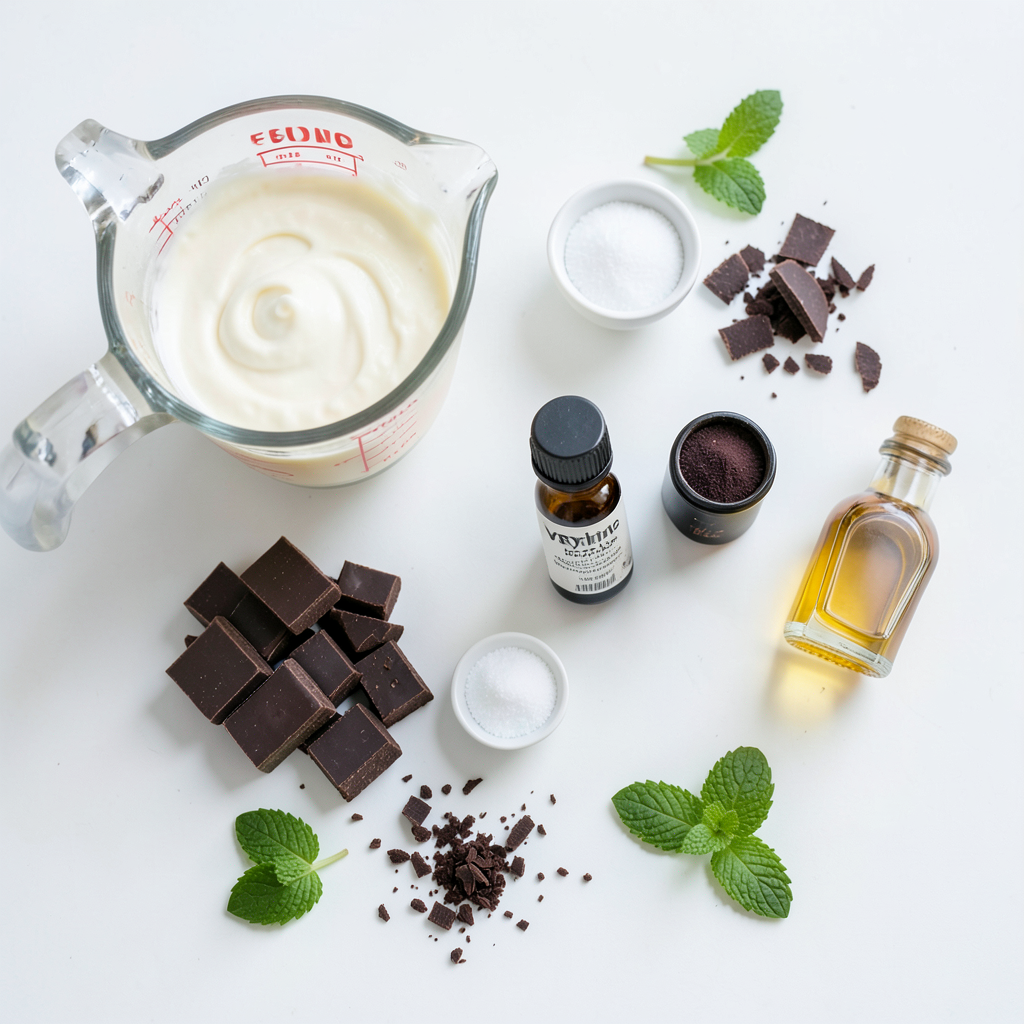
Detailed Ingredient List
- 1 cup heavy whipping cream
- 4 oz sugar-free dark chocolate, chopped
- 1 teaspoon peppermint extract
- 3 tablespoons erythritol or other keto-friendly sweetener
- 1/4 teaspoon vanilla extract
- A pinch of salt
- Optional: Dark chocolate shavings and fresh mint leaves for garnish
This recipe starts with heavy whipping cream. It gives the mousse its rich, creamy texture. Make sure to use heavy cream, as lighter creams won't whip as well.
Next, we need sugar-free dark chocolate. This chocolate keeps the dessert low in carbs and adds great flavor. Look for high-quality chocolate with at least 70% cocoa.
Peppermint extract brings that fresh minty taste to our mousse. Just a teaspoon is enough to give it a nice kick.
The sweetener is crucial for keeping it keto-friendly. Erythritol is a great choice. It adds sweetness without the carbs.
We also use vanilla extract for extra depth of flavor. Just a little goes a long way.
A pinch of salt helps to balance the sweetness. It enhances the chocolate flavor.
For those who want to make it extra special, optional garnishes like dark chocolate shavings and mint leaves add a nice touch. They make the mousse look pretty and inviting.
Gather these ingredients, and you will be ready to create a delightful keto dessert!
Step-by-Step Instructions
Melting the Chocolate
To melt sugar-free dark chocolate, start by chopping it into small pieces. This helps it melt evenly. Place the chopped chocolate in a microwave-safe bowl. Microwave it in 30-second bursts, stirring after each interval. Stop when the chocolate is smooth and fully melted. Be patient. If you heat it too long, it can burn. Let the melted chocolate cool for a few minutes before using.
Whipping the Cream
Next, pour heavy whipping cream into a large mixing bowl. You will need an electric mixer or a whisk. Begin whipping the cream on medium speed. Watch for soft peaks to form. This means the cream has thickened but is still soft. If you whip it too long, it may turn into butter. Stop when it looks fluffy and holds a shape.
Combining Ingredients
Now it’s time to mix the melted chocolate with the whipped cream. Take a spatula and gently fold the chocolate into the cream. Folding means you scoop from the bottom and turn the mixture over. This keeps air in and makes the mousse light. Make sure there are no streaks of chocolate left. The mixture should be smooth and creamy.
Setting the Mousse
After combining, it’s crucial to refrigerate the mousse. Spoon the mixture into serving cups. Cover them and place them in the fridge for at least one hour. This time helps the mousse set. To check if it is ready, gently shake the cup. If it holds its shape, it is set and ready to serve.
Tips & Tricks
Perfecting Texture and Flavor
To get the right mousse texture, start with cold heavy cream. This helps it whip up nicely. Whip it until soft peaks form. Don’t rush this step. Soft peaks give the mousse a light and airy feel.
When you fold in the melted chocolate, do it gently. This keeps air in the whipped cream. A smooth texture is key for a great mousse.
Sweetness is personal. You can adjust how sweet it is by adding more or less erythritol. Start with the amount in the recipe. Taste as you mix. You can always add more.
Presentation Tips
For the best look, use clear glass cups. They show off the mousse's rich color and texture. You can also drizzle some melted sugar-free chocolate on top. This adds a nice touch.
Garnish the mousse with dark chocolate shavings. Fresh mint leaves also work well. They add a pop of color and freshness. A simple garnish can make your dessert feel extra special.
Pro Tips
- Chill Your Tools: Before whipping the cream, chill your mixing bowl and beaters in the refrigerator for about 15 minutes. This helps the cream whip up faster and achieve a better volume.
- Quality Chocolate Matters: Use high-quality sugar-free dark chocolate for the best flavor. The chocolate's taste will significantly impact the overall mousse, so choose something you enjoy eating.
- Be Gentle: When folding the melted chocolate into the whipped cream, use a gentle hand to maintain the airy texture. Overmixing can lead to a dense mousse instead of a light and fluffy one.
- Set the Mousse: Allow the mousse to set for at least an hour in the refrigerator. This time helps the flavors meld and gives the mousse a firmer texture for easier serving.
Variations
Flavor Modifications
You can play with flavors in your keto chocolate mint mousse. First, try different extracts. Swap peppermint for vanilla or orange. This change brings a fresh twist to the mousse. You can also add other flavors, like coffee or hazelnut. A teaspoon of coffee can deepen the chocolate flavor. Hazelnut adds warmth and richness. Be bold with your choices and mix what you love!
Keto-Friendly Substitutions
If you want to change the sweetener, there are many options. You can use monk fruit or stevia instead of erythritol. They all keep the mousse low in carbs. If you need a dairy-free option, use coconut cream. It whips up beautifully and adds a light coconut flavor. Just remember to chill the coconut cream before whipping. This helps create the right texture. Enjoy making your mousse fit your diet!
Storage Info
How to Store Leftovers
To keep your mousse fresh, store it in the fridge. Place each cup in an airtight container. This will prevent any smells from mixing. The mousse stays tasty for about three days. After that, the texture may change.
Freezing the Mousse
Yes, you can freeze this mousse. It freezes well for up to one month. To freeze, place it in a freezer-safe container. Make sure to leave some space at the top for expansion. When you’re ready to eat, take it out and thaw it in the fridge overnight. Avoid thawing at room temperature, as this can affect the texture. After thawing, serve it right away for the best taste.
FAQs
Common Questions About Keto Chocolate Mint Mousse
Can I use regular chocolate instead of sugar-free? You can use regular chocolate, but it adds sugar. This changes the carb count and makes it not keto-friendly. Sugar-free chocolate keeps the recipe low in carbs, which is key for a keto diet.
How long can the mousse sit out before it needs to be refrigerated? The mousse can sit out for about 2 hours. After that, it should go back in the fridge. This helps keep it fresh and safe to eat.
Is this mousse suitable for other dietary restrictions? This mousse is low in carbs and gluten-free. However, if you have dairy allergies, you may need to find a dairy-free cream. Always check your sweeteners to ensure they fit your needs.
Can I make this mousse in advance? If so, how far ahead? Yes, you can make this mousse a day ahead. Just store it in the fridge. This way, it has time to set and flavors can blend well.
You now have a clear path to making a rich, keto-friendly chocolate mint mousse. We explored all the key ingredients, from heavy cream to flavor variations. I shared simple steps to melt chocolate and whip cream perfectly. Tips for garnishing and storing your mousse will help you impress guests. Lastly, remember that experimenting with flavors can lead to fun new desserts. Enjoy your creation, and don’t hesitate to make it your own!