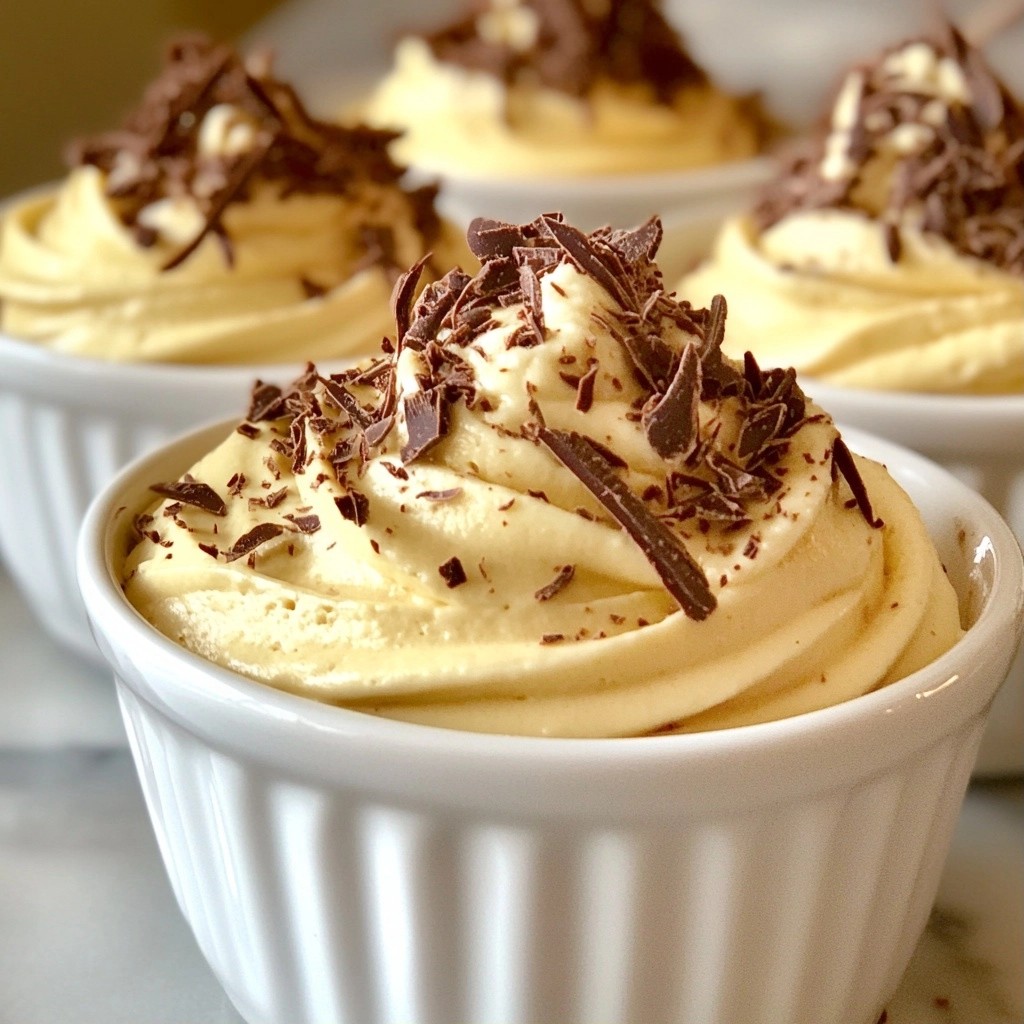
If you love peanut butter but want a guilt-free treat, let me introduce you to my Creamy Sugar-Free Peanut Butter Mousse. This delightful dessert is packed with flavor and easy to make. You only need a few ingredients, and I’ll show you how to whip it up in no time. Plus, I’ll share tips for making it even creamier and ways to customize it. Let’s dive into this tasty treat!
Why I Love This Recipe
- Easy to Make: This mousse comes together in just a few minutes, making it a quick and delightful dessert option.
- Guilt-Free Indulgence: With sugar-free ingredients, you can enjoy this treat without worrying about excess sugar intake.
- Rich and Creamy Texture: The combination of peanut butter and coconut cream creates a luxuriously creamy mousse that is incredibly satisfying.
- Customizable Flavor: You can easily adjust the sweetness and add different toppings to personalize your mousse experience.
Ingredients
List of Main Ingredients
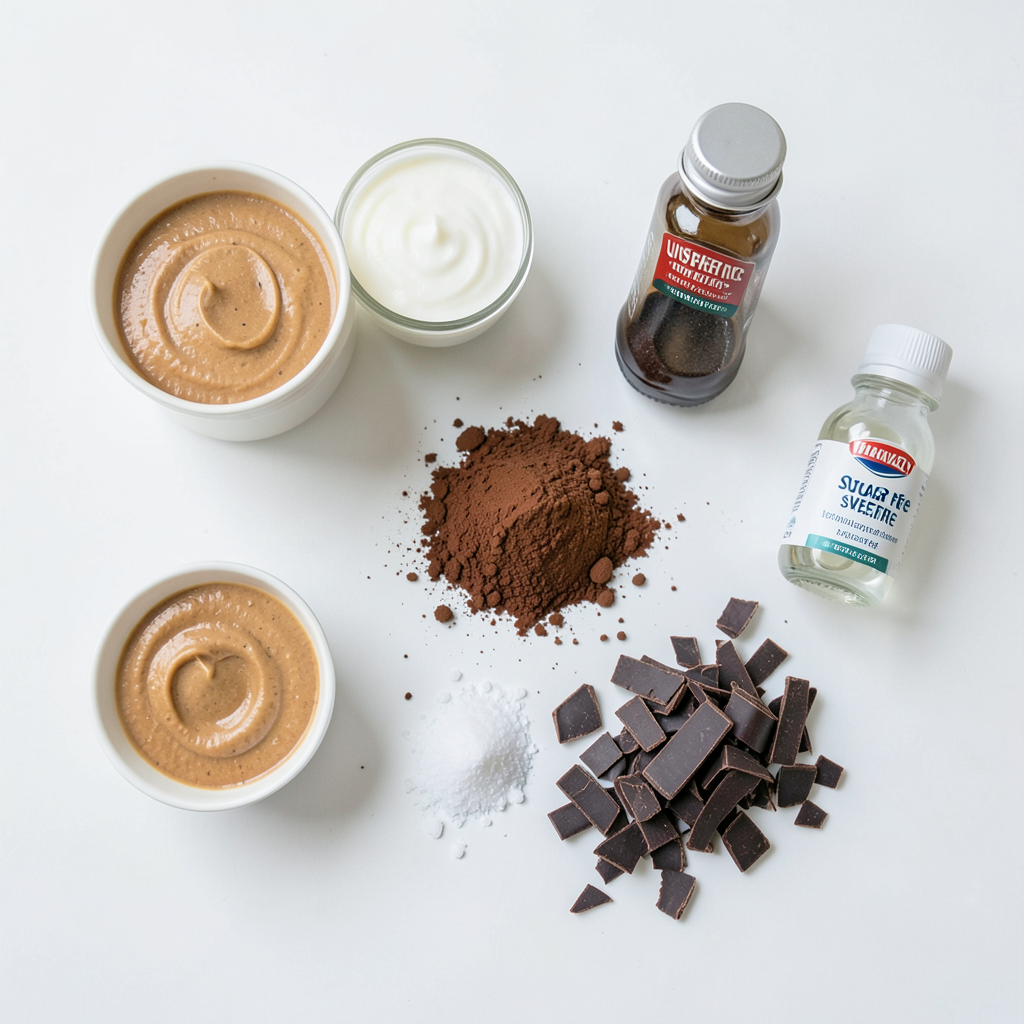
To make a creamy sugar-free peanut butter mousse, gather these key ingredients:
- 1 cup natural peanut butter (smooth)
- 1 cup coconut cream (chilled)
- 2 tablespoons unsweetened cocoa powder
- 1 tablespoon sugar-free sweetener (erythritol or stevia)
- 1 teaspoon vanilla extract
- A pinch of salt
These ingredients blend well to create a rich and smooth mousse.
Options for Sweeteners
You have several choices for sweeteners. Erythritol and stevia are popular options. Both add sweetness without sugar. You can also try monk fruit sweetener. Each sweetener may change the taste slightly. Adjust the amount to fit your taste. Start with one tablespoon and add more if needed.
Suggested Garnishes
Garnishes add a nice touch to your mousse. I recommend using dark chocolate shavings or cocoa nibs. These will enhance the chocolate flavor. You can also add fresh berries or a sprinkle of chopped nuts. They add color and texture to your dessert.
Step-by-Step Instructions
Preparation Steps
Start by gathering all your ingredients. You will need:
- 1 cup natural peanut butter (smooth)
- 1 cup coconut cream (chilled)
- 2 tablespoons unsweetened cocoa powder
- 1 tablespoon sugar-free sweetener
- 1 teaspoon vanilla extract
- A pinch of salt
- Dark chocolate shavings or cocoa nibs for garnish
Next, take the chilled coconut cream from the fridge. Make sure it's nice and cold. This step helps to create a fluffy mousse.
Mixing Techniques
In a large mixing bowl, add the chilled coconut cream and peanut butter. Use a handheld mixer on medium speed. Beat the mixture until it becomes smooth and creamy. This step is important to get the right texture.
Now, add the unsweetened cocoa powder, sugar-free sweetener, vanilla extract, and a pinch of salt. Continue to mix until all the ingredients blend well. The mousse should look light and fluffy. Taste it to see if you like the sweetness. If you want it sweeter, add more sweetener slowly. Mix well after each addition.
Chilling Process
Once your mousse is ready, spoon it into individual serving glasses or bowls. This makes it easy to serve. Now, cover them with plastic wrap or lids. Place the glasses in the refrigerator. Chill for at least 30 minutes. This step helps the mousse set and makes it even tastier.
Before serving, add dark chocolate shavings or cocoa nibs on top. This adds a nice touch and extra flavor. Enjoy your creamy sugar-free peanut butter mousse!
Tips & Tricks
Making the Mousse Even Creamier
To create a creamier mousse, use high-quality natural peanut butter. Look for brands with no added oils or sugars. This makes a big difference in texture. You can also add more coconut cream. This will make the mousse richer and smoother. If you want a lighter texture, try folding in whipped coconut cream at the end. This adds air and keeps it fluffy.
Adjusting Sweetness
Taste is key! After mixing the mousse, check the sweetness. If it's too mild, add more sugar-free sweetener. Do this a little at a time. Mix well after each addition. This helps you find the perfect balance. Remember, flavors can change as the mousse chills. It may taste sweeter once cold, so wait before you add too much.
Serving Suggestions
Serve the mousse in small glasses or bowls for a fancy touch. Chill it well for a refreshing dessert. Just before serving, top with dark chocolate shavings or cocoa nibs. This adds a crunchy contrast and looks beautiful. Pair it with fresh berries for a fruity twist. You can also serve it with a dollop of whipped cream for extra creaminess. Enjoy this treat with friends or family!
Pro Tips
- Use Chilled Coconut Cream: Ensure your coconut cream is well chilled before mixing. This helps in achieving a light and airy mousse texture.
- Experiment with Sweeteners: Different sugar-free sweeteners have varying levels of sweetness; taste the mousse and adjust the sweetener to your liking.
- Whip Separately for Extra Fluff: For an even fluffier mousse, consider whipping the coconut cream separately before folding it into the peanut butter mixture.
- Garnish Creatively: Try garnishing with crushed nuts or a drizzle of sugar-free chocolate sauce for added texture and flavor.
Variations
Flavor Add-ins
You can change the flavor of your mousse easily. Add a tablespoon of unsweetened cocoa powder for a rich chocolate taste. If you love coffee, mix in a teaspoon of espresso powder. This will boost the flavor and give you a nice kick. Want a nutty twist? Try adding chopped nuts or even a swirl of almond butter. Each option adds a new layer of yum!
Substitutions for Dietary Needs
If you need to make swaps for dietary needs, you have options. For a nut-free version, use sun butter instead of peanut butter. This keeps the creaminess but is safe for nut allergies. If you want a vegan mousse, use a plant-based sweetener like agave or maple syrup. Just remember to adjust the amount, as they are often sweeter than sugar-free options.
Alternative Garnishes
Garnishes can make your mousse look fancy. Instead of dark chocolate shavings, try using fresh berries. Strawberries or raspberries add a pop of color and flavor. You can also sprinkle chopped nuts on top for a crunchy finish. For a fun twist, add a dollop of sugar-free whipped cream. It makes each bite even more delightful!
Storage Info
Best Storage Practices
To keep your creamy sugar-free peanut butter mousse fresh, store it in airtight containers. This helps prevent it from absorbing any unwanted odors from your fridge. Use small glass jars or plastic containers with tight lids. Make sure the mousse is completely cooled before sealing it. This way, it will stay fluffy and delicious.
Shelf Life in Refrigerator
Your mousse can last in the fridge for up to five days. Keep an eye on it, though! If you notice any changes in texture or smell, it’s best to toss it. Always give it a quick stir before serving, as it may settle a bit. You want it to be just as creamy as when you first made it.
Freezing Options
You can freeze the mousse for a longer shelf life. Use ice cube trays or small containers for easy portioning. Just scoop in the mousse and freeze it. When you're ready to enjoy it, let it thaw in the fridge overnight. Avoid refreezing thawed mousse, as it may affect the texture. This makes it perfect for a quick treat anytime!
FAQs
What is the best peanut butter to use?
The best peanut butter for this mousse is natural and smooth. Look for one with just peanuts and salt. Avoid brands with added sugars or oils. This keeps your mousse creamy and rich. Natural peanut butter blends well with coconut cream and gives a fresh taste.
How can I make this mousse dairy-free?
To make this mousse dairy-free, use coconut cream as your base. It is rich and creamy without dairy. Ensure your peanut butter is also dairy-free, which most natural options are. This mousse will still taste great and have a lovely texture.
Can I make this recipe ahead of time?
Yes, you can make this mousse ahead of time. Prepare it and chill it in the fridge for up to two days. This allows the flavors to meld together. Just remember to garnish it right before serving for the best look and taste.
This blog post covered how to make a delicious mousse. We discussed main ingredients, sweeteners, and garnishes. I shared step-by-step instructions and tips to make it creamier. You learned about flavor variations and important storage info.
Now you have all you need to create a tasty mousse. Enjoy experimenting with different flavors and options. Happy cooking!