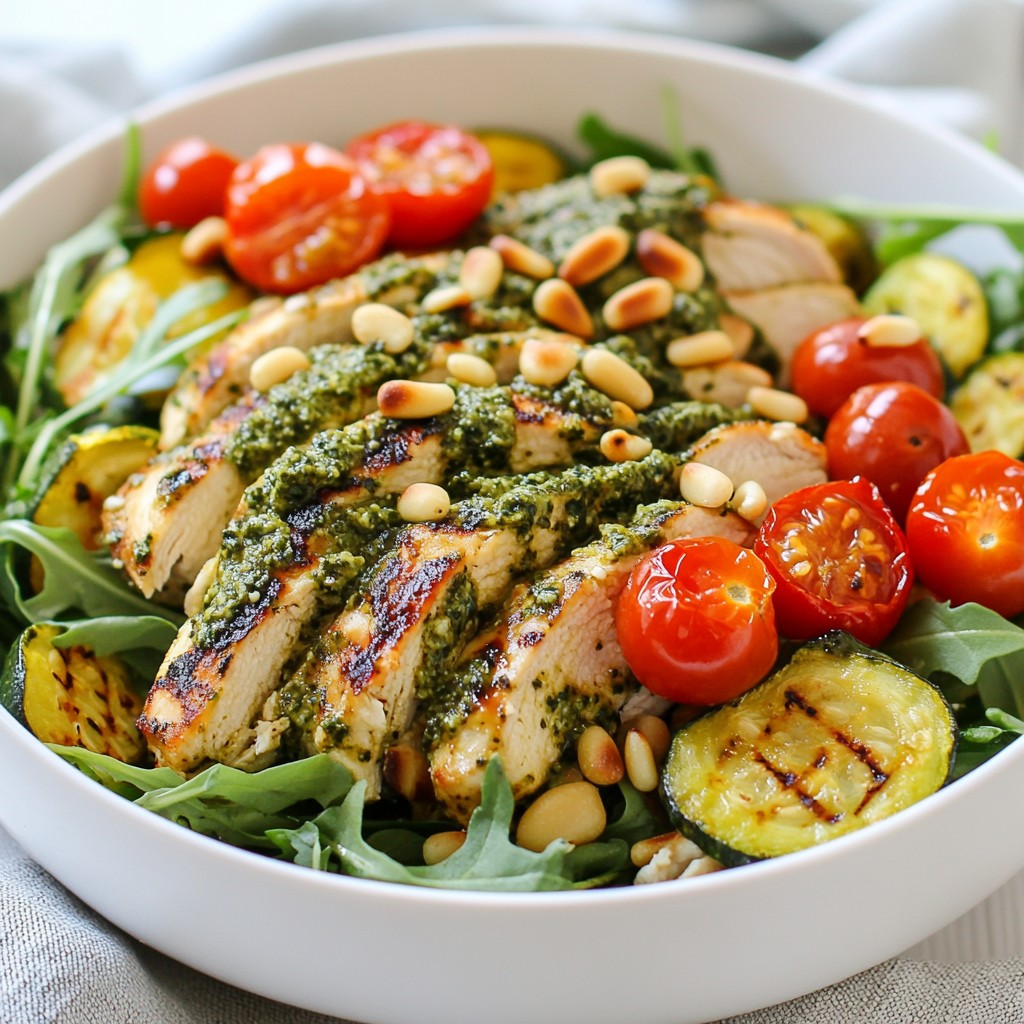
Are you ready to make a tasty dish that's easy on your waistline? These Easy Keto Basil Pesto Chicken Bowls are packed with flavor and great for a quick meal. In just a few simple steps, you'll whip up wholesome chicken and fresh zucchini, all topped with vibrant basil pesto. Whether you're new to keto or a pro, this recipe is sure to impress. Let’s dive into the delicious details!
Why I Love This Recipe
- Delicious Flavor: This Keto Basil Pesto Chicken Bowl is bursting with fresh flavors from the basil and garlic, making each bite a delightful experience.
- Healthy Ingredients: With fresh vegetables and lean chicken, this recipe is packed with nutrients while keeping it low in carbs.
- Quick and Easy: Ready in just 40 minutes, this dish is perfect for a busy weeknight dinner without sacrificing taste.
- Customizable: You can easily swap out ingredients or add your favorite veggies to make it your own!
Ingredients
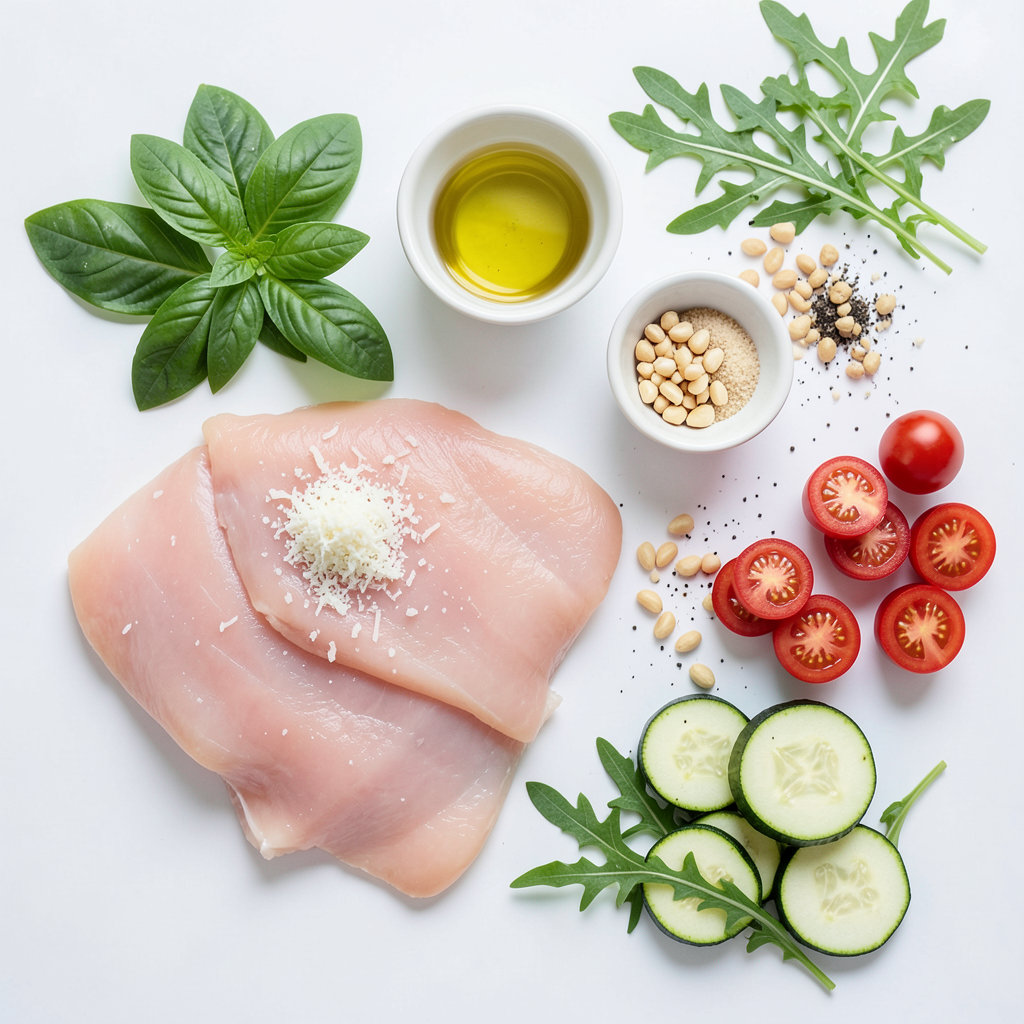
Required Ingredients for Easy Keto Basil Pesto Chicken Bowls
To make these tasty bowls, gather these key ingredients:
- 2 boneless, skinless chicken breasts
- 1 cup fresh basil leaves
- 1/3 cup grated Parmesan cheese
- 1/3 cup olive oil
- 2 cloves garlic, minced
- 1/4 cup pine nuts (or walnuts)
- Salt and pepper to taste
- 1 cup cherry tomatoes, halved
- 1 cup zucchini, spiralized or sliced
These items work together to create a fresh and hearty meal. The chicken brings protein, while the pesto adds rich flavor.
Optional Ingredients for Customization
You can add or swap a few things to make this dish your own:
- 1/2 cup arugula (optional, for garnish)
- Extra pine nuts for crunch
Feel free to toss in some extra veggies. Bell peppers or spinach can boost color and nutrition.
Substitutions for Dietary Preferences
If you need to adjust for diets or allergies, here are some swaps:
- Use turkey instead of chicken for a leaner option.
- Swap pine nuts for sunflower seeds if you have nut allergies.
- Replace Parmesan with nutritional yeast for a dairy-free choice.
These simple substitutions can help everyone enjoy this meal.
Step-by-Step Instructions
Preparing the Basil Pesto
Start by gathering your basil and other ingredients. You need fresh basil leaves, Parmesan cheese, olive oil, garlic, and pine nuts. Place them in a food processor. Add a pinch of salt and pepper. Blend until smooth. This process takes just a few minutes. The fresh basil pesto is now ready for your chicken.
Baking the Chicken
Next, preheat your oven to 400°F (200°C). Take the chicken breasts and place them in a baking dish. Coat each piece with the basil pesto. Make sure you cover them well. Reserve a little pesto for later. Bake the chicken for 25-30 minutes. It’s done when no pink remains in the center. Let it rest for a few minutes before slicing.
Sautéing the Zucchini
While your chicken bakes, it’s time to prepare the zucchini. Spiralize or slice the zucchini into thin pieces. Heat a sauté pan over medium heat. Add the zucchini to the pan and sauté for about 4-5 minutes. Season with a pinch of salt and pepper. The zucchini should be tender but still crisp.
Now, you are ready to assemble your Easy Keto Basil Pesto Chicken Bowls!
Tips & Tricks
Perfecting Your Basil Pesto
To make great basil pesto, use fresh basil leaves. They give the best flavor. Blend the basil with Parmesan cheese, garlic, and olive oil until smooth. I like to add pine nuts for a rich taste. If you want, walnuts work too. Adjust the salt and pepper to match your taste. For a twist, add a squeeze of lemon juice. It brightens the flavor.
Ensuring Juicy Baked Chicken
To keep your chicken juicy, don't overbake it. Bake at 400°F (200°C) for 25-30 minutes. Make sure the chicken is no longer pink inside. Coat the chicken with plenty of basil pesto. This adds flavor and moisture. Let the chicken rest for a few minutes after baking. This helps the juices stay locked in. Slicing it too early can dry it out.
Serving Suggestions and Presentation
For a beautiful bowl, start with sautéed zucchini as your base. Add a handful of fresh arugula for color and crunch. Slice the baked chicken and place it on top. Scatter halved cherry tomatoes for a pop of freshness. Drizzle with extra pesto for added flavor. Finally, sprinkle some pine nuts on top. This adds a nice crunch and makes the dish look fancy. Enjoy your meal!
Pro Tips
- Fresh Basil is Key: Use fresh basil leaves for the best flavor in your pesto. Dried basil will not provide the same aromatic punch.
- Perfectly Cooked Chicken: To ensure your chicken is juicy, let it rest after baking. This allows the juices to redistribute, resulting in tender meat.
- Customize Your Nuts: Feel free to swap pine nuts for walnuts or even almonds. Each nut adds a unique flavor and texture to your pesto.
- Add a Zing: For an extra layer of flavor, squeeze some fresh lemon juice over the assembled bowls right before serving.
Variations
Low-Carb Add-Ins
You can add more low-carb items to your Easy Keto Basil Pesto Chicken Bowls. Try adding avocado for creaminess. Cauliflower rice is another great option. It adds volume without many carbs. You can also use sliced radishes for a crunchy bite. These options keep your meal tasty and filling.
Protein Alternatives
Switching up the protein can change the whole dish. Shrimp cooks quickly and pairs well with pesto. Just sauté the shrimp until they turn pink. Turkey also makes a great choice. Ground turkey works well in place of chicken. It adds a different flavor and keeps the meal light.
Veggie Variations for Color and Nutrition
Adding colorful veggies makes your dish pop and boosts nutrition. Bell peppers add sweetness and crunch. Spinach is another good option. It cooks quickly and adds iron. Broccoli florets are great for texture too. Use any veggies you love to make the bowl your own. This way, you get a meal that looks good and tastes great!
Storage Info
Refrigerating Leftovers
You can store leftover Easy Keto Basil Pesto Chicken Bowls in the fridge. Use an airtight container. They will stay fresh for up to three days. When you’re ready to eat, just take them out.
Freezing Pesto and Chicken
If you want to keep your pesto and chicken longer, freezing works great. First, let the chicken cool completely. Then, slice it and place it in a freezer-safe bag. Pour some pesto over it. Seal the bag tightly, removing as much air as possible. You can freeze the chicken and pesto for up to three months.
Reheating Best Practices
To reheat, take the chicken out of the freezer a day before. Let it thaw in the fridge overnight. When ready to eat, place the chicken in a baking dish. Cover it with foil and warm it in the oven at 350°F (175°C) for about 15-20 minutes. This keeps the chicken moist. You can also reheat in the microwave for a quicker option. Just be careful not to overheat. Enjoy your tasty meal!
FAQs
How do I make the pesto more flavorful?
To boost your pesto's taste, try adding more garlic. You can also mix in some lemon juice for brightness. Fresh herbs like parsley can add depth. A pinch of red pepper flakes gives it a nice kick. Experiment and find what you love!
What are the best sides to serve with pesto chicken bowls?
Great sides include roasted vegetables, cauliflower rice, or a simple green salad. You might also enjoy zucchini noodles or a fresh tomato salad. Each side pairs well with the flavors of the pesto chicken.
Can I use store-bought pesto?
Yes, store-bought pesto works well in this recipe. It saves time and still tastes great. Just check the label for quality ingredients. Look for options without added sugars or preservatives.
Is this recipe suitable for meal prep?
Absolutely! These chicken bowls are perfect for meal prep. Cook a larger batch and store them in airtight containers. They last well in the fridge for a few days. Reheat and enjoy for lunch or dinner throughout the week.
How do I ensure the chicken stays tender?
To keep your chicken tender, avoid overcooking it. Bake it just until it reaches an internal temperature of 165°F. Let it rest for a few minutes after baking. This helps the juices stay inside, making each bite juicy and delicious.
This blog post shared how to make Easy Keto Basil Pesto Chicken Bowls. You learned about the key ingredients, step-by-step instructions, and useful tips for success. We also covered fun variations to spice up your dish, along with proper storage info. Lastly, the FAQs answered common questions you might have. These bowls are tasty, healthy, and easy to customize, making them perfect for any meal. Enjoy your cooking and feel free to get creative with this recipe!